
• Home
  • About
    • jute Bag

      Eco-Chic and Durable – Perfect for Sustainable Living.

      Cashew Nut Bag

      Sustainable jute bag for lasting cashew nut freshness

      Cocoa Bag

      Eco-friendly jute bag for rich cocoa flavor preservation

      Coffee Bag

      Elegant, durable jute bag to keep coffee beans fresh and eco-friendly

      Hazel Nut Bag

      Eco-conscious jute bag for hazelnut freshness and quality

      Shea Nut Bag

      Durable jute bag for fresh, organic shea nuts

      Tote Bag

      Stylish, eco-friendly jute tote for daily essentials

      Wheat Bag

      Sustainable jute bag for optimal wheat freshness

    • Jute Yarn

      Eco-Chic and Durable – Perfect for Sustainable Living.

      Jute Rope

      Sustainable jute bag for lasting cashew nut freshness

      Jute Fabrics

      Eco-friendly jute bag for rich cocoa flavor preservation

      Hessian cloth

      Sustainable Hessian cloth suppliers

  • Products
  • Export Country
  • Blog

How to Choose Custom Cellophane Self Adhesive Labels

Choosing custom cellophane self adhesive labels starts with the product, not the artwork. A clear label can let a jar’s color or a bottle’s contents remain visible, while a printed design adds contrast and brand detail. But appearance is only part of the decision. The label must suit the container’s shape, surface, and intended use.

Check the material and adhesive together. A label that sticks well to smooth glass may behave differently on textured plastic or a curved bottle. Consider whether the package will face moisture, refrigeration, handling, or frequent contact. Ask the supplier for specifications and samples, then apply them to the actual packaging. Leave them in the expected conditions and check for lifting edges, smudging, or bubbles. Small choices count.

Artwork needs practical attention, too. Fine text can become hard to read over a busy product, and pale ink may lose contrast on transparent stock. Review the label at its real printed size, not only on a bright screen. Confirm dimensions, core and roll direction if the labels will be applied by machine. These details are easy to overlook. I would not assume one material or adhesive works for every product; testing may reveal an inconvenient mismatch before a full order. The right choice balances appearance, application, durability, and cost. A careful comparison helps you specify labels that look intentional and perform reliably in their actual setting.
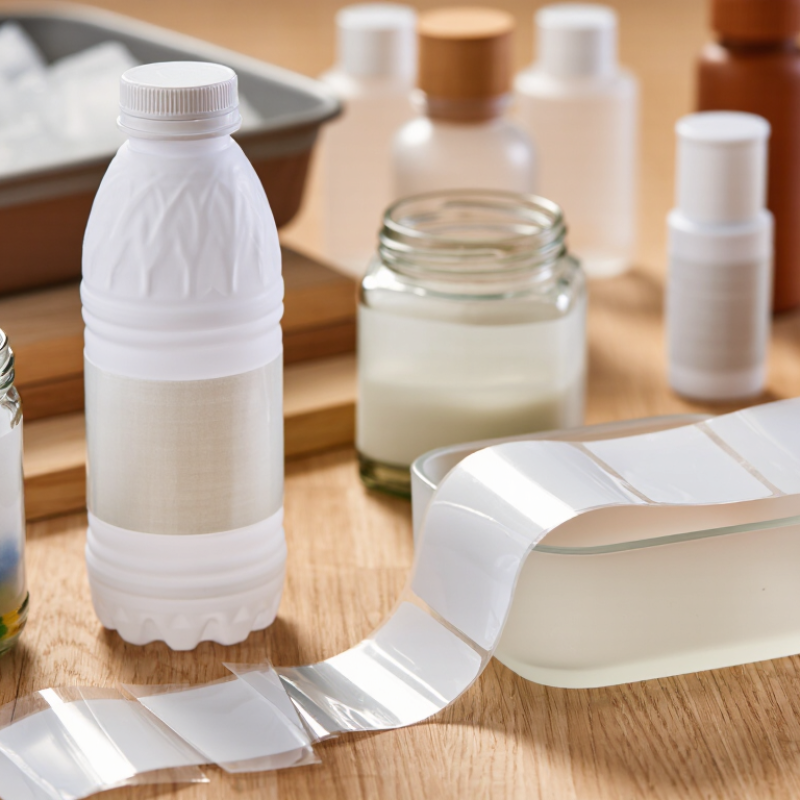
How to Choose Custom Cellophane Self Adhesive Labels

Define the Product and Labeling Requirements

How to Choose Custom Cellophane Self Adhesive Labels

Define the Product and Labeling Requirements

Start with the product, not the label shape. Is the container a dry glass jar, a chilled bottle, or a pouch that flexes during shipping? Record the surface material, curvature, storage temperature, moisture exposure, and expected label life. These details guide adhesive choice and reduce edge lifting. Measure the usable area, too. A label that wraps around a small jar can hide important information or wrinkle at the seam. Specify what must appear: product name, ingredients, batch details, or a barcode. Then confirm the print stays legible at the actual label size. Cellophane can look clear and refined, but glare, condensation, and dark contents may reduce contrast. Test a printed sample on the real package. Small trials catch costly surprises.

The scale of the category makes precise specifications useful. FINAT’s 2024 Radar report recorded a 2.7% decline in European self-adhesive label demand in 2023, to about 8.3 billion square metres. That market data does not predict your order, but it shows why material, format, and run size deserve careful review. Ask a converter to document the face material, adhesive, liner, and application conditions. For food-contact packaging, verify suitability with the supplier for the intended use; do not assume a clear label is automatically appropriate.

Tips: Apply samples to clean, dry containers. Check adhesion after chilling and handling. Note any curling, bubbles, or ink smearing. A clear brief is not always a perfect brief; revise it after testing.

Compare Cellophane Materials and Finish Options

How to Choose Custom Cellophane Self Adhesive Labels

Compare Cellophane Materials and Finish Options

Cellophane labels can offer a clear, crisp look, but the material behind the name matters. Ask whether the facestock is regenerated cellulose film and whether it has a coating. Coatings can affect print quality, moisture resistance, and how the label behaves during application. A clear label on a glass jar may show the contents neatly, while a matte surface can soften glare under bright shop lighting. Details matter.

Finish is more than appearance. Gloss often makes colors look brighter and wipes clean easily, while matte reduces reflections and gives small text a calmer look. Test print samples under the lighting where customers will see them. Also check ink adhesion, adhesive grip, and performance on your actual container. Cold glass, condensation, and curved surfaces can change how well a label stays put. One trade-off is easy to miss.

Tips: Request samples of each material and finish. Apply them to a clean container, then inspect edges after handling and storage. Ask the supplier about moisture limits and adhesive compatibility. If sustainability is important, verify the full label construction, including coatings and adhesive; cellophane alone does not determine how a finished label can be disposed of. A quick test beats a guess.

Choose Adhesive for the Surface and Environment

How to Choose Custom Cellophane Self Adhesive Labels

Choose an adhesive that matches both the surface and the conditions around it. Clean glass and smooth metal usually allow strong contact, while dusty cardboard and textured plastic can leave tiny gaps. Polyethylene and polypropylene are especially challenging because their surfaces have low surface energy. A label that sticks well in a sample room may lift on a cold, damp bottle. Test on the actual container. Small details matter.

The FINAT Technical Handbook’s FTM 1 peel-adhesion method evaluates bonds after defined dwell periods, including 20 minutes and 24 hours. That timing highlights an important point: initial tack is not the same as lasting adhesion. For refrigerated products, check performance after condensation forms. For outdoor use, test exposure to sunlight, rain, and temperature changes. Also confirm the adhesive’s application-temperature range; applying labels to chilled containers can reduce early bonding. I would not rely on one quick hand test alone.

Tips: Clean the surface, apply firm pressure, then check edges after 24 hours. Test a few labels on curved areas and seams. If the label lifts, revisit the adhesive choice before changing the cellophane film.

Choose Adhesive for the Surface and Environment

Indicative service-temperature ranges for common pressure-sensitive adhesive families. Actual limits vary by formulation and label construction. Check the adhesive technical data sheet, and confirm compatibility with the surface, moisture, and application conditions before choosing a label.

Set Label Size, Shape, and Printing Specifications

Start by measuring the usable panel, not the entire container. Leave room around seams, edges, and curves so the label does not lift or wrinkle. Specify the finished width and height, plus the corner radius if the design has rounded corners.

A narrow bottle may need a shorter label than its flat front suggests. Test the dimensions on a filled container; an empty sample can sit differently.

Small details matter. The ideal size is rarely obvious on screen.

Choose a shape that follows the package without forcing the film across a sharp curve. Then confirm the exact label material, adhesive, and finish with your printer, since “cellophane” can describe different film constructions.

For artwork, provide final-size files and define colors, print direction, and any white ink beneath colors on clear material. Without a white layer, pale text may disappear against the product.

Keep small type bold and readable, and check barcode contrast at actual size. Ask for a physical proof, not only a digital preview.

Proof it physically. Review cut lines, text, and placement on the real container, then confirm roll direction and core size if labels will be machine-applied.

A tiny shift can matter.

Review Samples and Confirm Production Quality

Before approving custom cellophane self-adhesive labels, review a sample made with the intended film, adhesive, and print finish. A paper mockup cannot show how the label behaves on slick, flexible packaging. Ask for a production-like sample, not only a digital proof. Check text sharpness, color consistency, and whether fine lines remain visible against the transparent material. Small details matter. View the label under both bright and ordinary indoor light; transparent film can make pale ink appear faint. Apply it to the actual package and smooth it down by hand. Look for bubbles, curled corners, or edges that lift after a day.

It is tempting to approve a sample based on appearance alone. That can mislead. Test adhesion on clean packaging, then handle and gently rub the label to check for smearing or scuffing. If the package will be chilled or stored in a humid area, ask for samples tested in similar conditions. Results can vary with surface texture and temperature, so record what you observe rather than relying on a general promise. Before full production, confirm the approved sample, label dimensions, winding direction, and any color tolerances in writing. Keep one signed or clearly identified sample for comparison with delivered rolls. Even careful checks may miss a small variation, so inspect labels from different parts of the first production batch.

How to Choose Custom Cellophane Self Adhesive Labels - Review Samples and Confirm Production Quality
Review Dimension Sample A: Clear Film Sample B: White Film Sample C: Printed Film Production Quality Check
Face material Clear regenerated cellulose film; suitable when the container or surface should show through. White regenerated cellulose film; provides an opaque background for text and graphics. Clear regenerated cellulose film with a printed white underlayer in selected areas. Confirm the material is specified as cellulose film, not assumed to be the same as polypropylene. Match the approved sample’s clarity, color, and surface finish.
Film thickness Approximately 30 μm Approximately 35 μm Approximately 35 μm Check the agreed face-stock thickness and tolerance on the purchase specification; compare a production roll with the approved sample.
Adhesive and liner Permanent pressure-sensitive acrylic adhesive; glassine release liner. Permanent pressure-sensitive acrylic adhesive; glassine release liner. Permanent pressure-sensitive acrylic adhesive; glassine release liner. Confirm adhesive type, liner, and intended application surface. Test labels on the actual packaging, since adhesion varies with surface energy, cleanliness, and temperature.
Print appearance Unprinted; check film clarity and visible adhesive haze. Printed black text on white stock; check legibility and color consistency. Multicolor print with a white underlayer; check opacity, registration, and color match. Review the signed artwork proof and approved physical sample. Inspect for smudging, pinholes, missing print, and noticeable color variation.
Die-cut and label size 50 × 30 mm rectangular label; rounded corners. 60 × 40 mm rectangular label; rounded corners. 50 mm diameter circular label. Measure label dimensions and corner or circle shape. Confirm clean cuts without cutting through the release liner or leaving difficult-to-remove matrix.
Adhesion review Apply to clean glass and check for edge lift after 24 hours. Apply to the intended packaging surface and check for sliding or edge lift. Apply to the intended packaging surface; inspect print and label edges after application. Test on the actual substrate under the expected application conditions. Record application temperature and dwell time; define any peel-strength requirement with the supplier before production.
Moisture and handling Check for curling, wrinkling, or loss of clarity after normal handling. Check for edge lift and surface damage after handling. Check for ink scuffing and edge lift after handling. Cellulose film can be sensitive to moisture and humidity. Test the label in the intended storage and use environment rather than relying on appearance alone.
Roll format and dispensing Confirm core size, roll direction, and label spacing for the applicator. Confirm roll width, core size, and unwind direction. Confirm unwind direction and label position against the application equipment. Approve a roll-layout drawing that states roll width, core diameter, labels per roll, gap, and unwind direction. Run a production roll through the applicator if applicable.
Final sample decision Choose when transparency is the priority and the application surface is compatible. Choose when an opaque print background and clear text contrast are needed. Choose when clear areas and printed opaque areas are both required. Sign and retain an approved reference sample. Confirm materials, artwork, dimensions, tolerances, roll specifications, and inspection requirements before authorizing the production run.
Evaluation note: The sample descriptions and dimensions are example specifications for comparison, not laboratory test results. Use the final approved artwork and measured supplier samples to set product-specific acceptance limits.
Shopping Basket