
• Home
  • About
    • jute Bag

      Eco-Chic and Durable – Perfect for Sustainable Living.

      Cashew Nut Bag

      Sustainable jute bag for lasting cashew nut freshness

      Cocoa Bag

      Eco-friendly jute bag for rich cocoa flavor preservation

      Coffee Bag

      Elegant, durable jute bag to keep coffee beans fresh and eco-friendly

      Hazel Nut Bag

      Eco-conscious jute bag for hazelnut freshness and quality

      Shea Nut Bag

      Durable jute bag for fresh, organic shea nuts

      Tote Bag

      Stylish, eco-friendly jute tote for daily essentials

      Wheat Bag

      Sustainable jute bag for optimal wheat freshness

    • Jute Yarn

      Eco-Chic and Durable – Perfect for Sustainable Living.

      Jute Rope

      Sustainable jute bag for lasting cashew nut freshness

      Jute Fabrics

      Eco-friendly jute bag for rich cocoa flavor preservation

      Hessian cloth

      Sustainable Hessian cloth suppliers

  • Products
  • Export Country
  • Blog

How to Choose the Best Tile Cutter for Your Project

Choosing the best Tile Cutter begins with understanding your tiles, workspace, and cutting habits. Porcelain, ceramic, glass, and natural stone each behave differently under pressure. A cutter that glides through ceramic may struggle with dense porcelain. Measure the tile thickness, length, and required cut type before comparing models. Small details matter, including handle comfort, guide accuracy, scoring-wheel quality, and base stability.

Tile installation educator Michael Byrne once advised, “The best tool is the one that gives you control over the material.” That principle remains useful when selecting a Tile Cutter. A manual cutter can provide fast, clean straight cuts without electricity. An electric wet cutter may suit thick porcelain, repeated cuts, or difficult materials. However, more power does not automatically mean better results. It can create extra setup, noise, water, and cleanup.

Test before committing.

Experienced installers often inspect the scoring action on a sample tile. The wheel should leave one continuous, confident line, not several scratches. The breaker should separate the tile cleanly, without excessive edge chipping. I have found that beginners sometimes focus too heavily on price. That approach can fail when a cheaper cutter produces uneven cuts across a visible floor. Still, expensive equipment is not magic. Even a professional Tile Cutter needs careful measuring, steady pressure, and suitable technique. This guide compares cutter types, practical features, common mistakes, and project-specific performance. It also questions an easy assumption: the “best” cutter may not be the strongest model, but the one that matches your material, accuracy needs, and real working conditions.
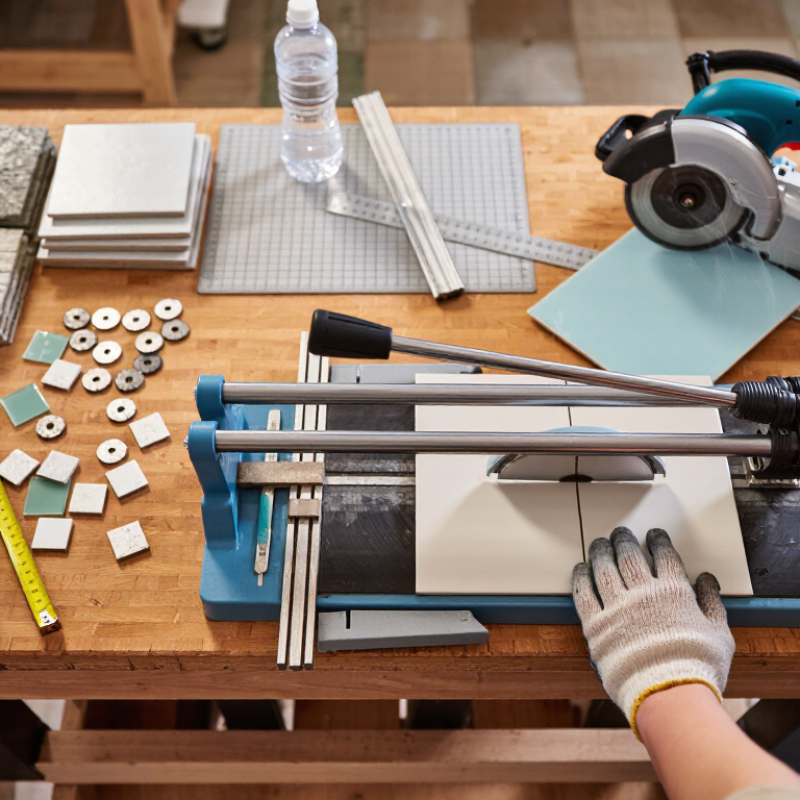
How to Choose the Best Tile Cutter for Your Project

Project Requirements and Tile Cutter Selection Criteria

Choosing a tile cutter starts with the project, not the tool. Measure tile size, thickness, hardness, and total area. Porcelain often needs more scoring force than ceramic tile. Natural stone may require wet cutting and a stable work surface. Check the cut pattern too. Straight cuts, narrow strips, and diagonal cuts demand different control. In my site experience, many poor cuts came from mismatched expectations, not weak equipment. That was an expensive lesson.

For occasional wall tile, a manual cutter can be practical, clean, and quick. Choose one with a rigid base, smooth guide rails, and an adjustable fence. The scoring wheel should match the tile surface and thickness. For dense porcelain, compare the cutter’s rated capacity with your actual tile. Do not rely on maximum claims alone. A wet saw suits thick materials, repeated cuts, and stone, but it needs electrical safety, water management, and ventilation. It also creates slurry. Plan for that.

Selection should include ergonomics, replacement parts, calibration, and transport. Test the handle movement before purchase if possible. It should feel controlled, not merely powerful. Read technical documentation and verify cutting depth, fence accuracy, and warranty terms. Wear eye protection and follow the tool’s instructions. I once accepted a small deviation because it seemed harmless; repeated rows made it obvious. Allow a few spare tiles for learning, especially around outlets and corners. The best cutter matches your material, cutting volume, workspace, and skill level.

Comparing Manual, Electric, and Specialty Tile Cutters

How to Choose the Best Tile Cutter for Your Project

Comparing Manual, Electric, and Specialty Tile Cutters

A manual tile cutter suits many straight cuts on ceramic and moderately hard porcelain tiles. It scores, then snaps the tile along a guided line. This method is quiet, portable, and produces little dust. Choose a model with a stable base and a cutting wheel matched to the tile surface. Measure twice. I have learned that rushing the score often causes jagged breaks, especially near narrow edges.

An electric wet cutter handles dense porcelain, thick tiles, and repeated cuts more reliably. Water cools the blade and helps control airborne dust during cutting. It also makes bevels and longer cuts easier, but setup takes space and time. Keep the work area level, use eye and hearing protection, and follow the tool’s electrical safety instructions. A clean, continuous feed usually gives a straighter edge than forcing the tile through.

Specialty cutters solve specific problems. Tile nippers can shape small curves, while hole saws create openings for pipes. Mosaic work may need precision nippers or a small scoring tool. These tools are useful, but they are not magic. Edges can still chip. For visible corners, leave extra material and refine the cut gradually with a suitable rubbing stone. Tile thickness, material hardness, cut shape, and project volume should guide the choice more than price alone. My own selection is sometimes imperfect; testing one spare tile first prevents expensive mistakes.

Matching Cutter Features to Tile Type and Thickness

How to Choose the Best Tile Cutter for Your Project

Matching the cutter to the tile matters more than choosing the largest tool. Ceramic wall tile is usually thin and cuts cleanly with a manual score-and-snap cutter. Choose a rigid base, a sharp scoring wheel, and a fence that holds the tile square. For porcelain, check the stated thickness capacity carefully. Dense porcelain may resist a basic cutter, especially near edges or around narrow strips.

Natural stone needs more control. A wet saw with a suitable diamond blade can reduce chipping on granite, marble, or slate. Water also helps manage heat and airborne dust.

For small mosaics, tile nippers can shape individual pieces, but they rarely produce a straight, polished edge. An adjustable guide helps with repeated cuts, while a stable table prevents movement during scoring.

Measure the tile, including its back coating and surface texture. A cutter rated for 10 millimeters may struggle with a rigid tile that measures slightly more. I have seen clean scores fail because the operator rushed the snap. Slow pressure is often better.

Still, no tool prevents every mistake. Test one spare tile first, then inspect the cut edge under strong light. Wear eye protection, keep wet-cutting equipment away from unsafe electrical connections, and remember that a cheaper cutter can cost more after several broken tiles.

Evaluating Cutting Accuracy, Safety, and User Convenience

How to Choose the Best Tile Cutter for Your Project

Evaluating Cutting Accuracy, Safety, and User Convenience

A good tile cutter should produce clean edges without forcing excessive pressure. Before buying, check its maximum cutting length and diagonal capacity. Measure your largest tile twice. Small mistakes become expensive quickly.

Manual cutters work well for standard ceramic tiles and repeated straight cuts. A stable scoring wheel should move smoothly across the glazed surface. I prefer models with clear measurement guides and a firm base. My first project taught me this lesson. A loose guide caused several uneven cuts. Wet cutters can reduce dust and handle harder materials, but they require more setup and careful water management. The cutting line should remain visible throughout the process.

Safety affects both results and confidence. Wear eye protection, sturdy gloves, and footwear with good grip. Keep electrical connections away from standing water when using a wet cutter. Never hold your fingers close to the scoring path. Slow pressure is safer than sudden force. A quiet, balanced tool is easier to control during long sessions. Some cutters feel convenient in the store but become tiring after an hour. I still underestimate cleanup time. Check whether the tool has comfortable handles, readable markings, and simple blade or wheel adjustments. Test these features before starting the full installation. A small practice cut can reveal vibration, slipping, or unexpected chipping.

Testing, Maintaining, and Replacing Your Tile Cutter Properly

How to Choose the Best Tile Cutter for Your Project

Testing, Maintaining, and Replacing Your Tile Cutter Properly

A reliable tile cutter starts with a controlled test, not a confident guess. Check the frame, guide rail, scoring wheel, blade guard, power cord, and water line before cutting. Place a scrap tile on the table. Make one slow pass and inspect the edge. Chipping, wandering, or unusual vibration signals trouble. It may be the blade, not your technique.

Wet cutting also requires disciplined maintenance. The U.S. Occupational Safety and Health Administration limits respirable crystalline silica exposure to 50 micrograms per cubic meter over eight hours. NIOSH recommends similar exposure control through wet methods and local ventilation. Keep the water stream aimed at the cutting point. Replace dirty water often. Clean slurry from the pump, tray, and guide rails after each session. A dry, clogged pump can fail quietly.

Replace the cutter when its blade is cracked, visibly warped, heavily chipped, or repeatedly produces rough edges after cleaning. Stop immediately if the cord insulation splits or the switch feels unreliable. Never treat a dull blade as harmless. It can force extra pressure and increase breakage. I have sometimes blamed the tile first, which was a poor assumption. Test a fresh blade on a spare piece before changing your cutting plan. Check the manufacturer’s service interval and the tool’s safety instructions, because universal replacement timings do not exist.

Shopping Basket