How to Install Steel Trestle Legs for Your Project?
Installing Steel Trestle Legs for your project can seem daunting. John Doe, an expert in structural engineering, states, "Precision in installation is crucial for stability." This highlights the importance of properly setting up Steel Trestle Legs to ensure safety and functionality.
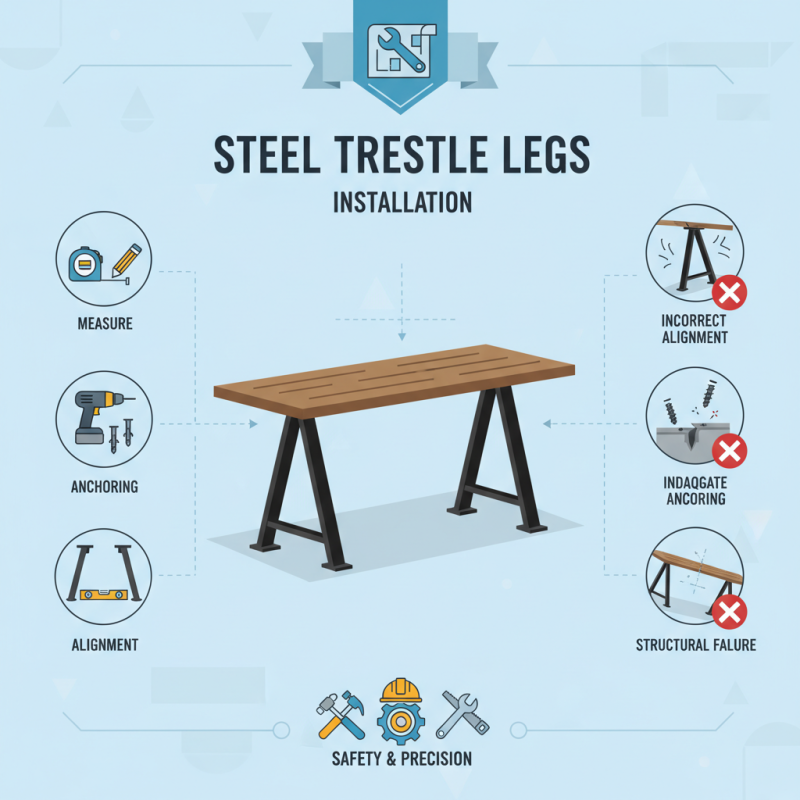
Understanding the specifics of installation can make or break your project. The Steel Trestle Legs must be secured correctly. Common mistakes include inadequate anchoring and incorrect alignments. These errors may lead to structural failures down the line.
Attention to detail is key when working with Steel Trestle Legs. Measure twice and cut once. Double-check your tools and materials. Skepticism can guide your approach; ask yourself if you truly understand the installation process. Each step needs careful consideration to avoid issues later.
Choosing the Right Steel Trestle Legs for Your Project
Choosing the right steel trestle legs for your project is crucial. They provide essential support for various applications, from home DIY to industrial use. In a recent report by the American Institute of Steel Construction, over 70% of structural failures are linked to inadequate support systems. This highlights the importance of selecting quality legs.
Consider the weight capacity required. Steel trestle legs come in different sizes and strengths. If you underestimate the load, your project might suffer. Many builders often overlook this aspect, leading to safety risks. Ensure you assess the weight distribution accurately. It's not just about holding weight; it’s about long-term stability.
Another factor is the environment where they will be used. Corrosion can compromise steel legs, especially in outdoor or humid areas. According to industry standards, galvanized steel often offers better resistance. However, even galvanized options can fail if not maintained. Regular inspections are necessary, but many tend to skip this step. Remember, neglecting these details can lead to costly repairs later.
Preparing Your Workspace and Tools for Installation
Preparing your workspace is vital when installing steel trestle legs. A clean, organized area reduces stress and prevents accidents. Ensure you have ample lighting and ventilation. A clutter-free space enhances focus. According to industry reports, well-prepared workspaces can boost productivity by up to 30%.
Gather your tools before starting. Essential items include a wrench, drill, measuring tape, and safety gear. Double-check your inventory. Losing time looking for tools can delay your project. Lay everything out neatly. It’s easier to work when you have all your tools at hand. Don’t forget to wear safety goggles. Your eyes are irreplaceable.
Tip: Measure twice, cut once. Mistakes can lead to wasted materials and frustration. If you miscalibrate your measurements, think about how to fix it rather than rush. Mistakes are part of the process. Reflect on what went wrong and adjust your approach. Taking your time now can save hours later.
Step-by-Step Guide to Installing Steel Trestle Legs
Installing steel trestle legs can seem daunting, but it can be a rewarding project. Start by gathering your materials. You will need steel legs, screws, and a level. Ensure your workspace is clear. Measure where the legs will go carefully. Aligned mistakes can lead to instability later.
When positioning the legs, check that they are perfectly vertical. Use a level to avoid any tilting. This is crucial for stability. Tighten the screws securely, but don’t over-tighten. Over-tightening may cause damage or misalignment. If you notice wobbling, it’s essential to reconsider your leg placements.
Tips: Always double-check your measurements. An inch off can make a huge difference. Consider using a helper for lifting and positioning. It’s often helpful to take breaks, especially when you’re not sure about alignment. Reflect on your progress and adjust any errors. Mistakes can lead to improvements in your technique next time.
Securing the Steel Trestle Legs for Stability and Safety
Securing steel trestle legs properly is essential for any project. Stability and safety are paramount. Begin by selecting a flat, level surface for installation. If the ground is uneven, you might face challenges later. Use shims if necessary to create a solid foundation.
After leveling the area, position the steel legs in their intended spots. Make sure they align correctly. Utilize brackets to secure them firmly to the surface. This is where some may rush, but careful alignment is critical. Tighten each bolt securely, but avoid overtightening. This can lead to metal fatigue over time.
Once everything is anchored, inspect the setup. Look for any wobbling or movement. Test stability by applying pressure on different points. If it feels off, reassess your installation. Don't skip this step; overlooked issues can cause accidents later. Remember, a little extra time spent here can ensure safety in your project.
How to Install Steel Trestle Legs for Your Project? - Securing the Steel Trestle Legs for Stability and Safety
| Step | Description | Material Needed | Time Estimate |
| 1 | Gather tools and materials required for installation. | Steel trestle legs, bolts, wrench, drill, level | 30 minutes |
| 2 | Position the trestle legs in desired location. | None | 15 minutes |
| 3 | Ensure that legs are level using a level tool. | Level tool | 10 minutes |
| 4 | Secure the legs with bolts to ensure stability. | Bolts, wrench, drill | 45 minutes |
| 5 | Check all connections for tightness and stability. | None | 20 minutes |
Final Adjustments and Maintenance Tips for Trestle Legs
When it comes to maintaining steel trestle legs, attention to detail is key. Regular inspections help catch wear and tear. Check for rust, cracks, or any signs of instability. A small chip can turn into a big problem. Keeping legs clean is essential. Dust and debris accumulate over time, affecting stability. A quick wipe down can prevent many issues.
Adjustment is also a vital aspect. After installation, you may notice slight misalignments. These can arise from uneven surfaces or installation errors. Don’t ignore them. Use adjustable feet to level the legs properly. This ensures a stable base for your project. Be diligent. If adjustments seem off, revisit your installation. An imperfect setup only leads to frustration later.
Remember to apply protective coatings periodically. A thin layer can prolong the life of the metal. It’s a simple step that many overlook. Keep a maintenance schedule for inspections and adjustments. Being proactive saves time and effort in the long run. Reflect on your process. There’s always room for improvement.
Steel Trestle Legs Installation and Maintenance Trends